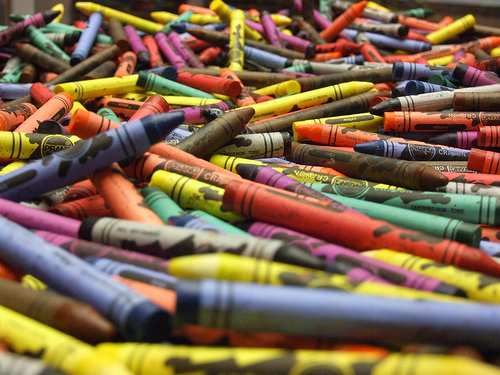
The older the artist, the smaller the crayons become. Many kids don’t have a problem with broken crayons. Many kids ignore them. Many kids get gifted several boxes of crayons in a year, or build up a collection over time. Throwing crayon pieces away is one of the most dissatisfying clean-up jobs to parents and day-care providers. Creative ones have decided that recycling these crayons is a worthwhile endeavor, and making new, useful crayons is a most popular project. Here are some ideas to get you started on your way to a new crayon life.
The Double-Boiler method: Using no one’s favorite pan, melt the crayons on the stove in a double boiler. This is done by placing water in a pot to boil, and placing the crayons in a separate pot on top, floating in the boiling water. Using a ladle, measuring cup, or if your pot has a lip, pour the melted wax into the molds and set to cool. Karen Barnes had the best recipe I found for this method.
The Oven Method: Grease Muffin pans or use paper liners. Place filled muffin pans into low temperature oven and remove when melted. Cool and peel crayons. More ideas on this here: Perpetual Preschool
Material Variations: Crayola crayons melt, blend, and return to solid better than off-brand crayons, so you may want to sort your crayons by brand. Melting shaved Ivory Soap with the crayons changes final wax consistency, melting time, and requires fewer crayons in a batch. 18th Century Secrets in Arts, Trades, and Crafts has a special twist on the whole crayon-making venture.
And…Here’s how I do it.
Materials: Collect crayons and metal bottle caps, aluminum caps, plastic caps and corks. Wash these thoroughly. A coffee can or similar bucket-like container that can be kept out of the way is ideal. In the summertime, when your sun is hot, find a place around your home that seems to absorb a lot of heat. I use my deck, but concrete, rocks, or even your car’s hood can suffice. Accumulate some candy molds or soap molds. If they are plastic, test one in your hot-spot for a couple of hours and make sure it is not going to melt. You can also make wet sand or cornstarch molds by making a shallow dish of your substance and pressing a form into it, like a child’s hand, or a toy. You can also use snack sized plastic bags.
Prepare: Shred or crush your crayons. A good way is to place your color-sorted crayons in a bag on concrete. Cover the bag with rocks of various sizes, and that with a board. Stand on the board and roll around on the crayons, crushing them between the concrete and the rocks. The board saves your feet and ankles from the rocks. Another idea is to run them through the crayons sharpener on the back of the 64 or greater box. Arrange your crushed crayons in the molds, being careful with the sand and cornstarch molds as to not deform them. The powdered crayon that accumulate in the corners of your bags works better for this.
Make: Set your molds in the sun. Leave, depending on your altitude (sun intensity) altitude, and external temperatures, for one to four hours. While the crayons are melting, make a cold space for cooling: space in a freezer or a cooler with ice. When all the crayon shavings have melted, gently place a bottle cap vertically in the melted wax. This serves to prevent direct contact with the wax when coloring, much like the paper wrapper crayons come in. If you are using sand or starch molds, place a tray of ice over the top of the molds to cool them first, then you can transfer the molds without deforming them. After about two hours, your new molded crayons have cooled, so you can remove them from the molds. The soft-mold methods can be rinsed away. Package them in shallow boxes so they don’t bump off your mold detail.
My personal affinity for my method is a notable absence of melted-crayon smell in my house, using natural energy, and the various swirled color effects, with the random chunk, I can achieve. It makes an amazing science project, art project, and ecology lesson at one time, and I hope that you can make it your own, as well.
Image courtesy of Gaetan Lee
Comments